Hi guys!
For this months of January, "the king's cake" will be my subject. In France, the tradition of serving this frangipane-filled tart can be traced back to the 14th century. A small bean, coin or porcelain fève is baked inside the cake, and whoever receives the little favor is then crowned king or queen of the day, to ensure no cheating, the youngest goes under the table and select to who goes each piece of the cake. Then the crowned king pick his queen or the crowned queen her king.
Last year was my first time baking this King's cake and I realized how easy it was I could not believe it! A lot of recipes are available on the net but usually they are on the heavy side using only an almond cream filling, the secret is to mixed the almond cream with some pastry cream, believe me, much lighter, less sweet and delicious!
So this year I made our King's cake, the crowns and the fève with the kids, we had a really good time!!!
The making of the "fève":
For that we used the modeling clay FIMO, you can of course make any shape you want, it just needs to be not bigger that 2x2 cm, when you finished with you shapes, bake them at 110º for maximum 30 minutes and then they become hard like plastic.
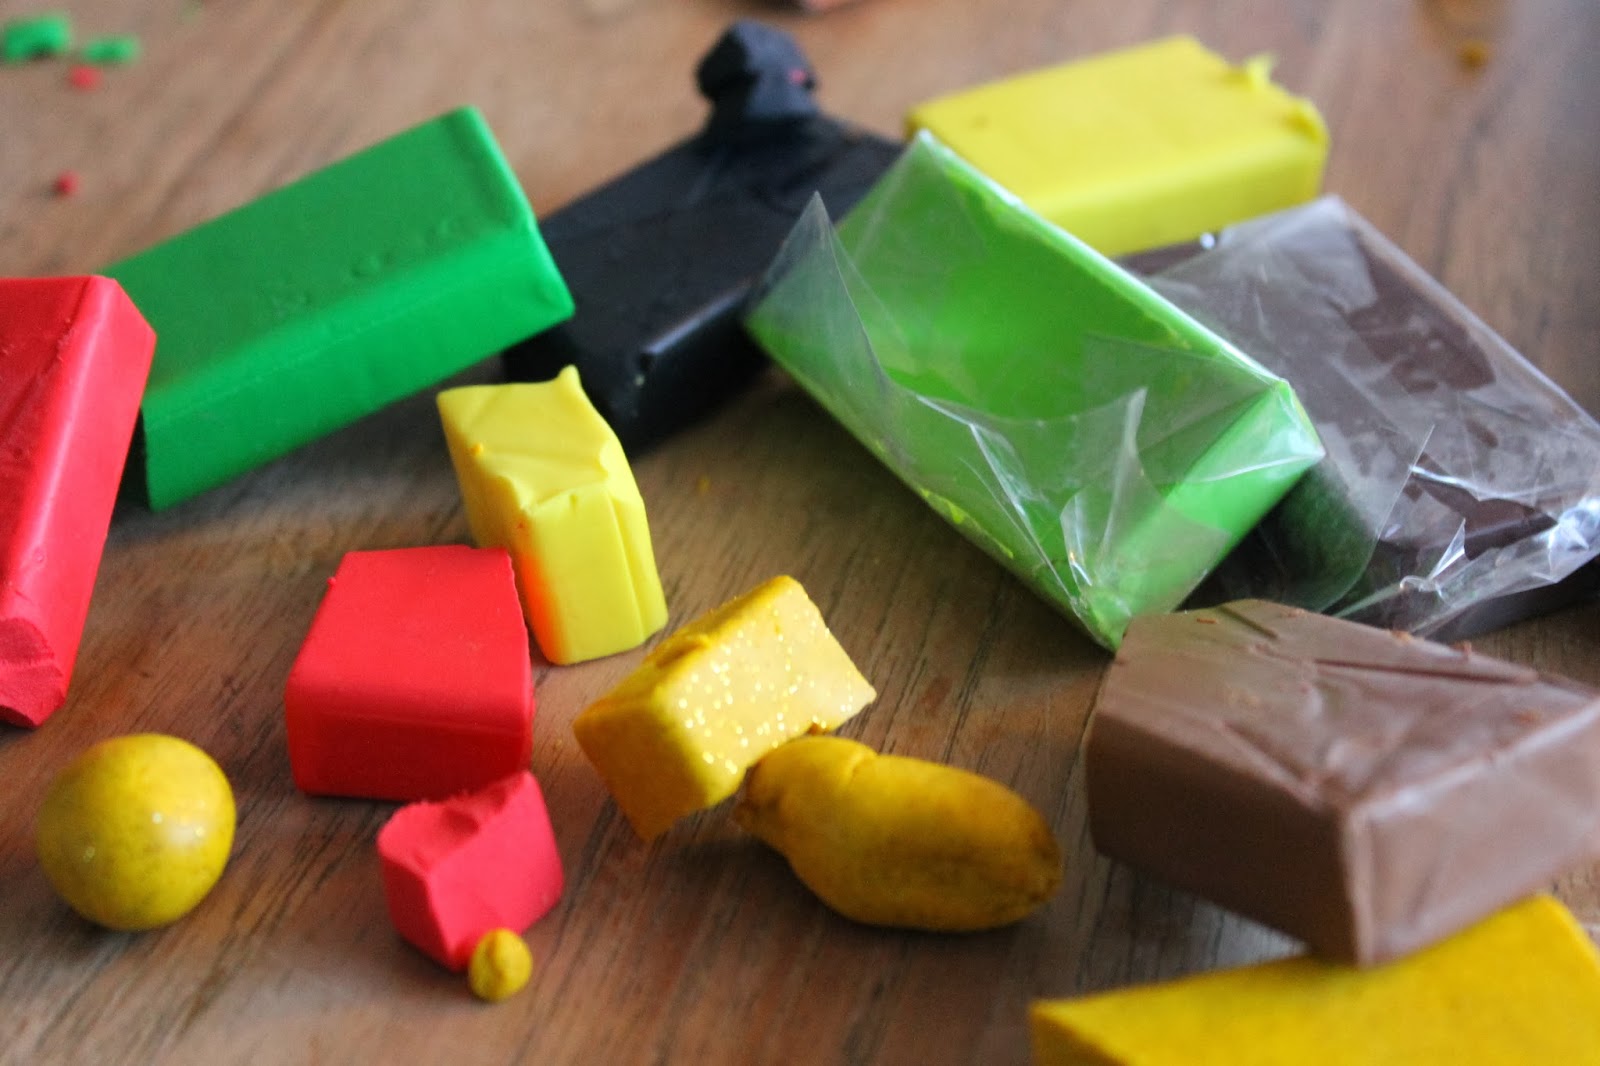 |
| The modeling clay, FIMO |
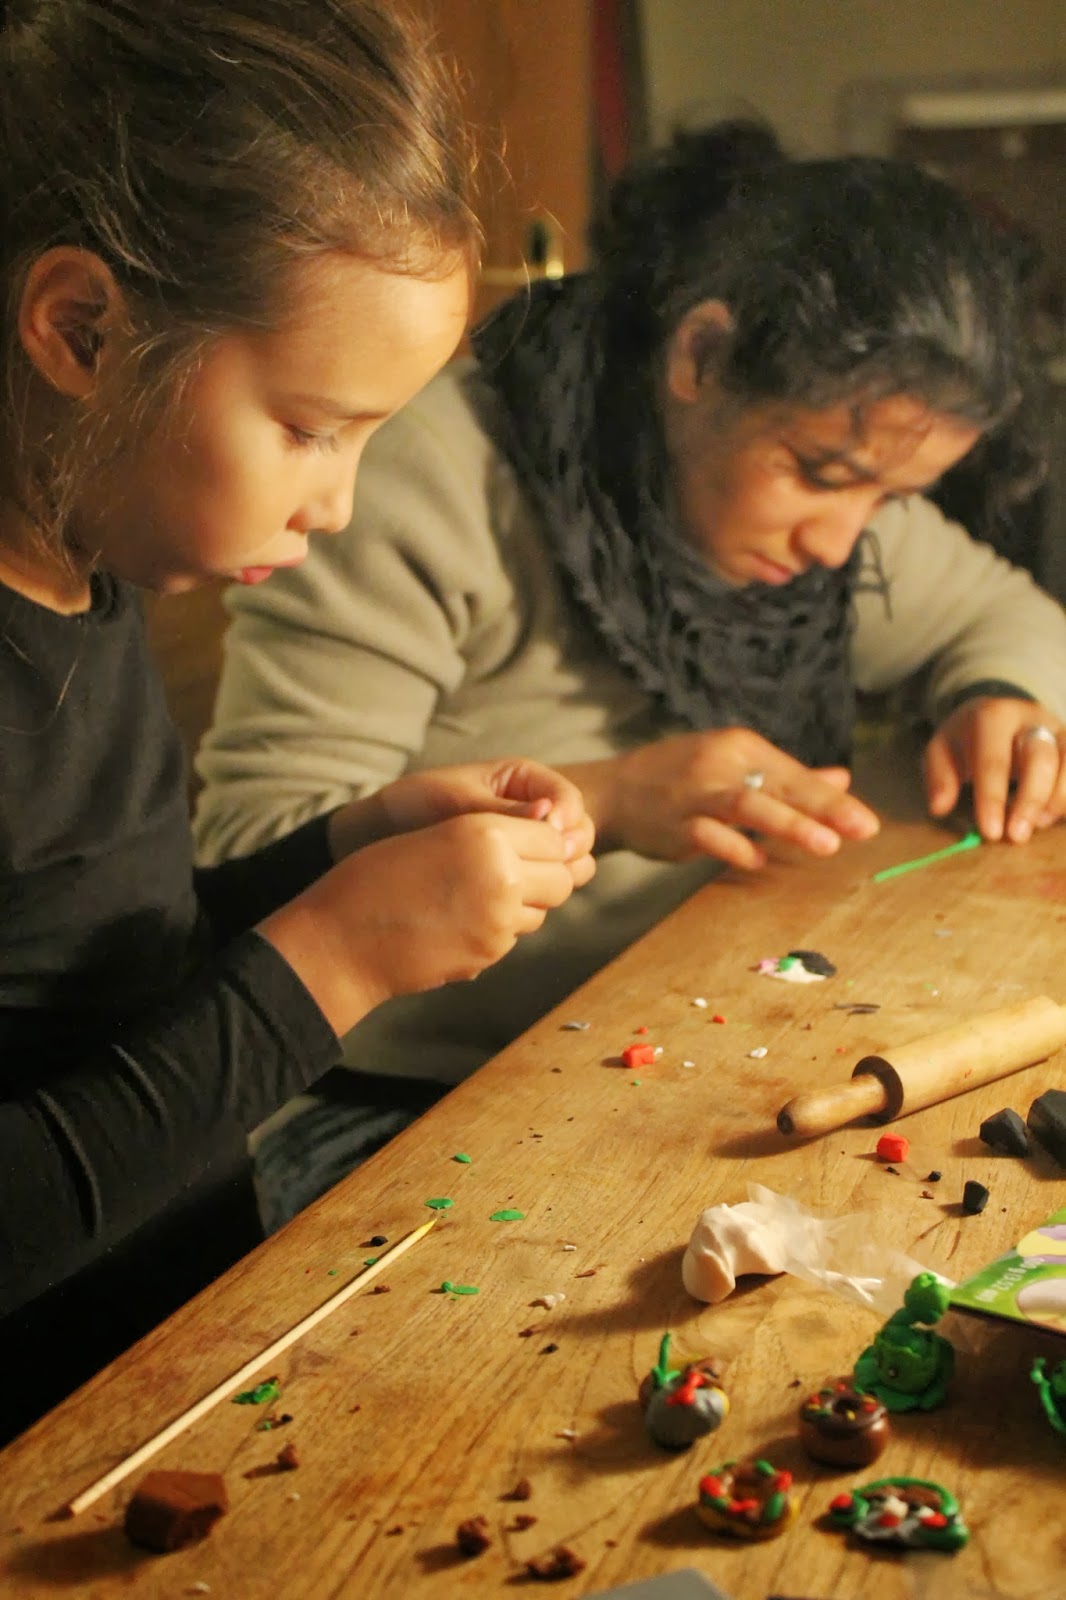 |
Matilda and Manu in the making...
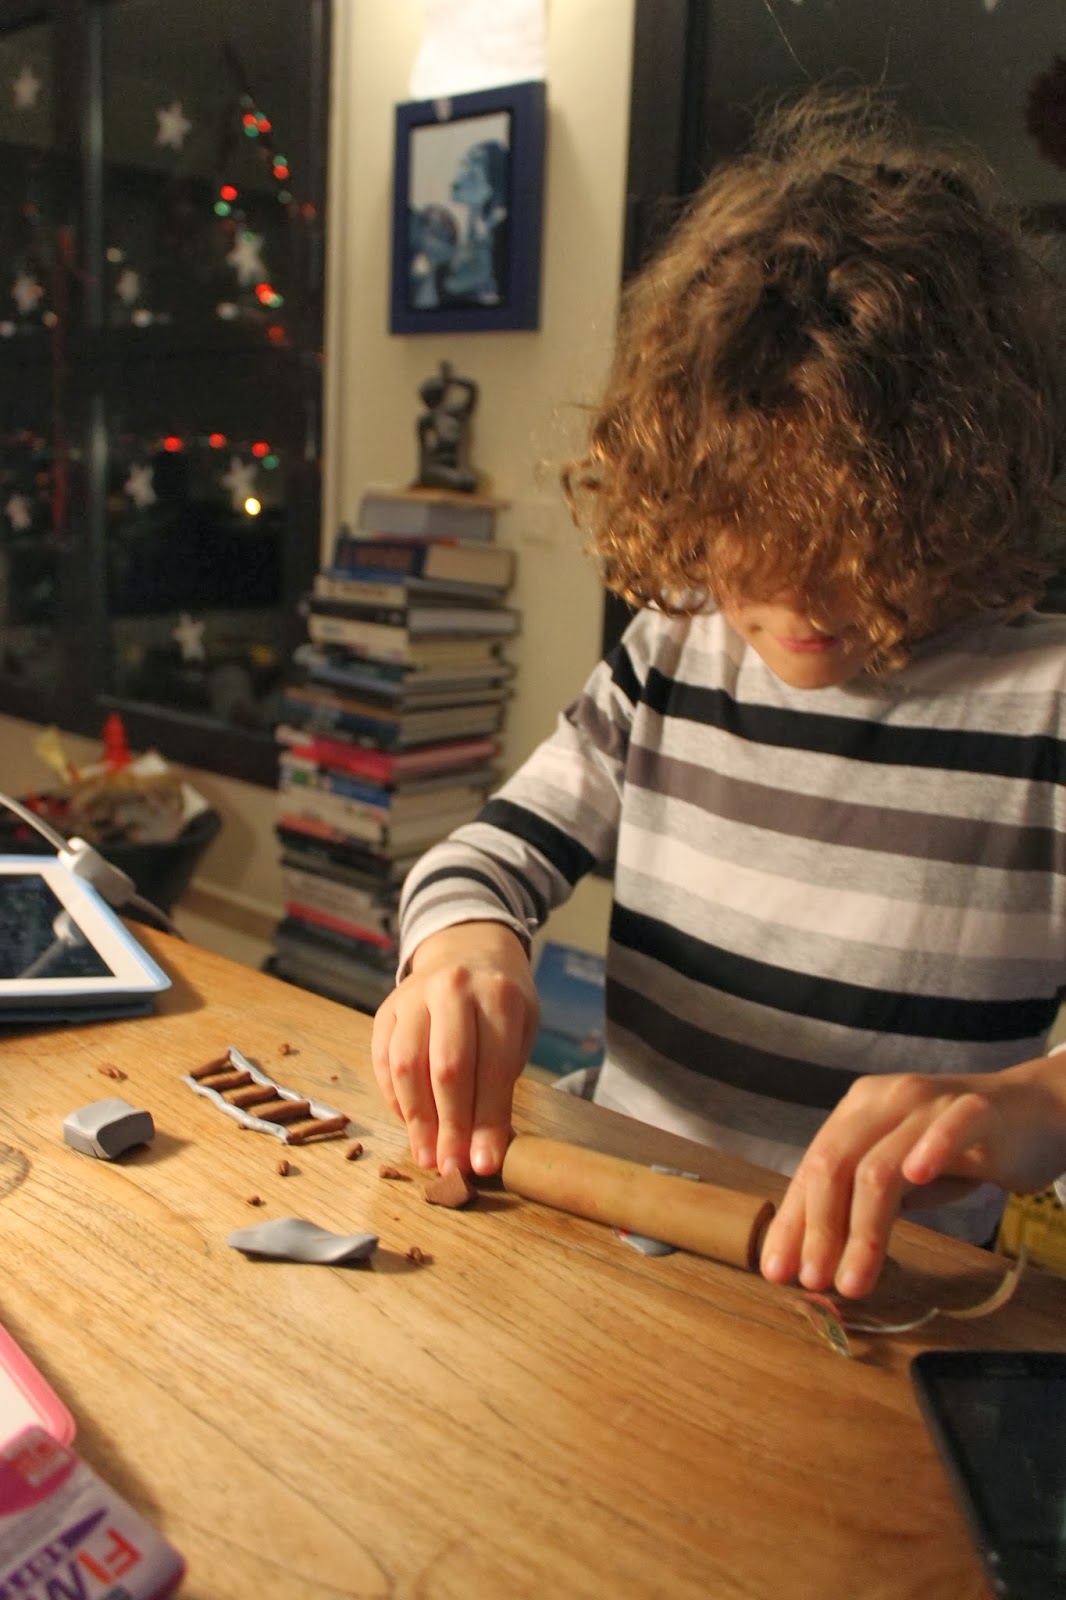 |
| And Jack... |
|
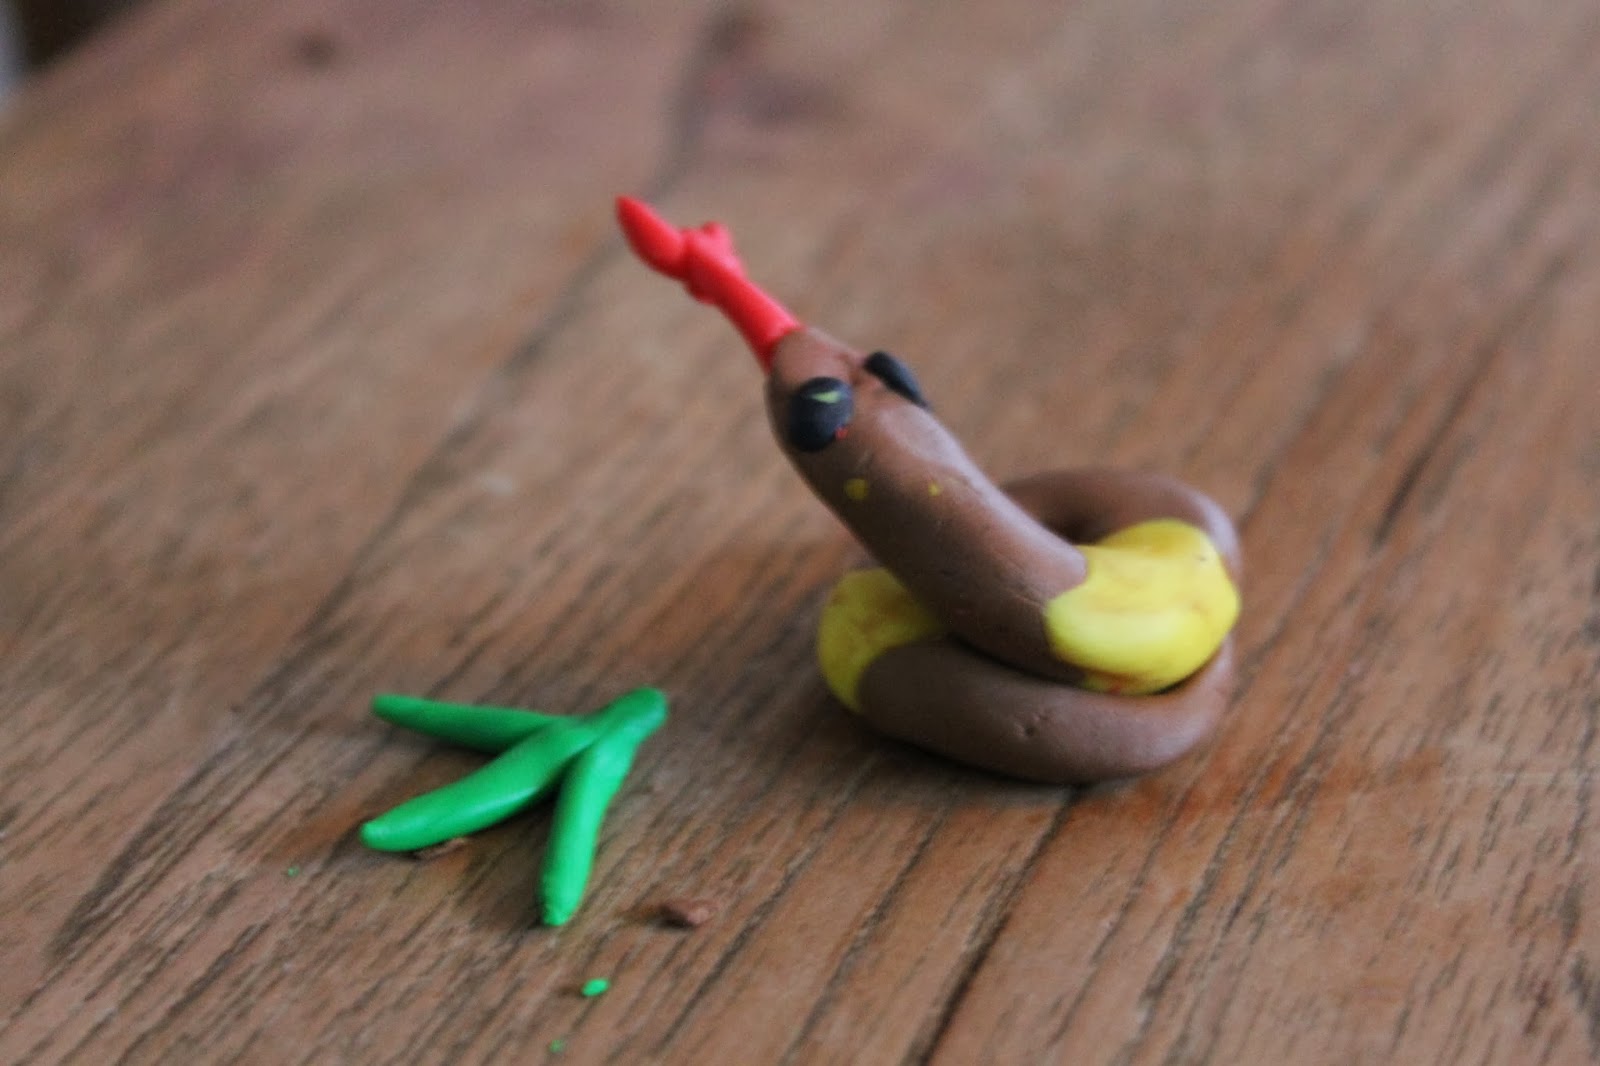 |
| Jack's snake... |
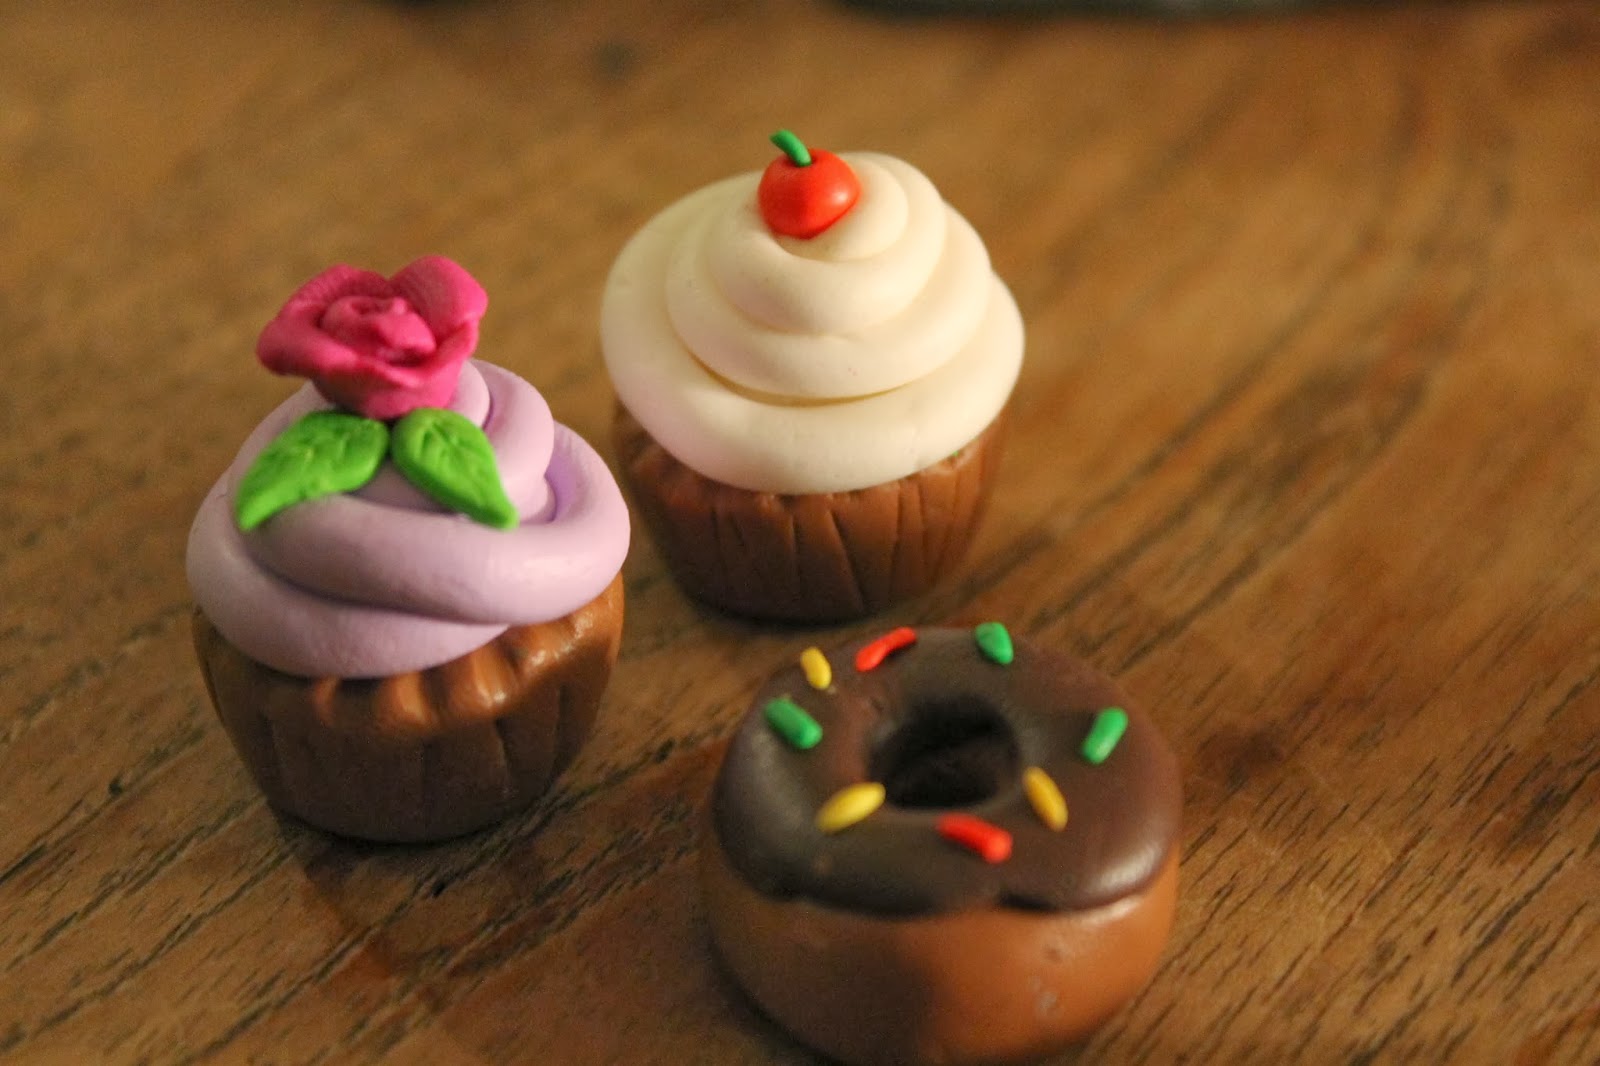 |
| And I made tiny little pastries... |
The making of the crowns:
Easy peasy, let them draw the shape of crown and decorate them with stickers, sequins, anything you have in hands...
The making of the King's cake:
The King's Cake:
You will need :
- a pastry cream
- an almond cream
- 2 tablespoons of Disaronno (italian liquor) or rum
- 2 already made puff pastries
- an egg
-1 fève
for the pastry cream, you will need:
- 3 egg yolks
- 80 g sugar
- 2 tablespoons flour
- 400 ml milk
In a bowl, mix the eggs with the sugar and the flour.
Add the hot milk into the bowl, mix well
Put this mixture in a saucepan, let it cook at low/medium heat, stirring at all time until it thickens.
Let it cool down, then put it aside in the fridge covered.
Your pastry cream is done!
for the almond cream, you will need:
- 3 egg yolks
- 125g finely grated almond
- 100g sugar
- 125g room temperature butter
Mix the soft butter with the sugar until smooth and pale.
Mix in the yolks and the grated almond.
Your almond cream is done!
Preheat your oven at 180º C.
To make the "frangipane", the filling of the King's cake, mix the pastry cream with the almond cream.
Add the liquor, mix very well.
Paint the edge of the first puff pastry with the egg yolk (2 cm).
Spread the frangipane in the center.
Add the fève. If using the one you made in Fimo clay, wrap it first in foil.
I made this one in porcelain so no need to wrap it.
Put delicately the second puff pastry on top, try to not leave any air inside and press the edge.
Paint allover the tart with the egg yolk (add a drop of water if you want to make the yolk more liquid).
Decorate with a small knife, be careful not to pierce the puff pastry.
Make 2 or 3 incisions for the air to escape during the baking.
Bake for 25/30 minutes or until nice and gold.
And ta daaa!!!!
A beautiful galette des rois!
And there you have it! Wonderful time with the kids in the making with a delicious cake to enjoy all together at the end!!! Mmmmmh, bon appétit!!
Miss Drey
Hi guys!
For this months of January, "the king's cake" will be my subject. In France, the tradition of serving this frangipane-filled tart can be traced back to the 14th century. A small bean, coin or porcelain fève is baked inside the cake, and whoever receives the little favor is then crowned king or queen of the day, to ensure no cheating, the youngest goes under the table and select to who goes each piece of the cake. Then the crowned king pick his queen or the crowned queen her king.
Last year was my first time baking this King's cake and I realized how easy it was I could not believe it! A lot of recipes are available on the net but usually they are on the heavy side using only an almond cream filling, the secret is to mixed the almond cream with some pastry cream, believe me, much lighter, less sweet and delicious!
So this year I made our King's cake, the crowns and the fève with the kids, we had a really good time!!!
The making of the "fève":
For that we used the modeling clay FIMO, you can of course make any shape you want, it just needs to be not bigger that 2x2 cm, when you finished with you shapes, bake them at 110º for maximum 30 minutes and then they become hard like plastic.
|
| The modeling clay, FIMO |
|
Matilda and Manu in the making...
|
| And Jack... |
|
|
| Jack's snake... |
|
| And I made tiny little pastries... |
The making of the crowns:
Easy peasy, let them draw the shape of crown and decorate them with stickers, sequins, anything you have in hands...
The making of the King's cake:
The King's Cake:
You will need :
- a pastry cream
- an almond cream
- 2 tablespoons of Disaronno (italian liquor) or rum
- 2 already made puff pastries
- an egg
-1 fève
for the pastry cream, you will need:
- 3 egg yolks
- 80 g sugar
- 2 tablespoons flour
- 400 ml milk
In a bowl, mix the eggs with the sugar and the flour.
Add the hot milk into the bowl, mix well
Put this mixture in a saucepan, let it cook at low/medium heat, stirring at all time until it thickens.
Let it cool down, then put it aside in the fridge covered.
Your pastry cream is done!
for the almond cream, you will need:
- 3 egg yolks
- 125g finely grated almond
- 100g sugar
- 125g room temperature butter
Mix the soft butter with the sugar until smooth and pale.
Mix in the yolks and the grated almond.
Your almond cream is done!
Preheat your oven at 180º C.
To make the "frangipane", the filling of the King's cake, mix the pastry cream with the almond cream.
Add the liquor, mix very well.
Paint the edge of the first puff pastry with the egg yolk (2 cm).
Spread the frangipane in the center.
Add the fève. If using the one you made in Fimo clay, wrap it first in foil.
I made this one in porcelain so no need to wrap it.
Put delicately the second puff pastry on top, try to not leave any air inside and press the edge.
Paint allover the tart with the egg yolk (add a drop of water if you want to make the yolk more liquid).
Decorate with a small knife, be careful not to pierce the puff pastry.
Make 2 or 3 incisions for the air to escape during the baking.
Bake for 25/30 minutes or until nice and gold.
And ta daaa!!!!
A beautiful galette des rois!
And there you have it! Wonderful time with the kids in the making with a delicious cake to enjoy all together at the end!!! Mmmmmh, bon appétit!!
Miss Drey


