Hi lil'guys!
Matilda has been asking me for a tea party for a few weeks now, just with her closest friends... And because it was just for a play date, I decided to go for the lowest budget that I could go for, so here it is what I came up with...
Any party, small or big needs a pretty invitation,
Matilda drew sweet fairy version of her guest friends and herself, I wrote their name on top of each silhouette, then I photocopied them 6 times (5 guests + 1 for Matilda for keepsake), cut each little fairies in a petal shape; I had some pretty paper in my "art" cupboard, I glued my 6 petals into a flower on it, then cut the edges following the petals, I finished by cutting two circles and glued them in the center as heart of the flower...
Of course at the back, I wrote the the details of the party, the date and the time, the address and a little map if necessary, a phone number/email address with a date to RSVP. I do write usually the programme of the party but it is not a must. Here are them!!!....They are so cute!!!...


For the Fairy Tea Party table,
We will need obviously tea cups and saucers, pretty plates for the "finger food" and a cupcake stand (they are so elegant on a party table...) So i got some paper cups, dessert plates and normal paper plates, all in white...
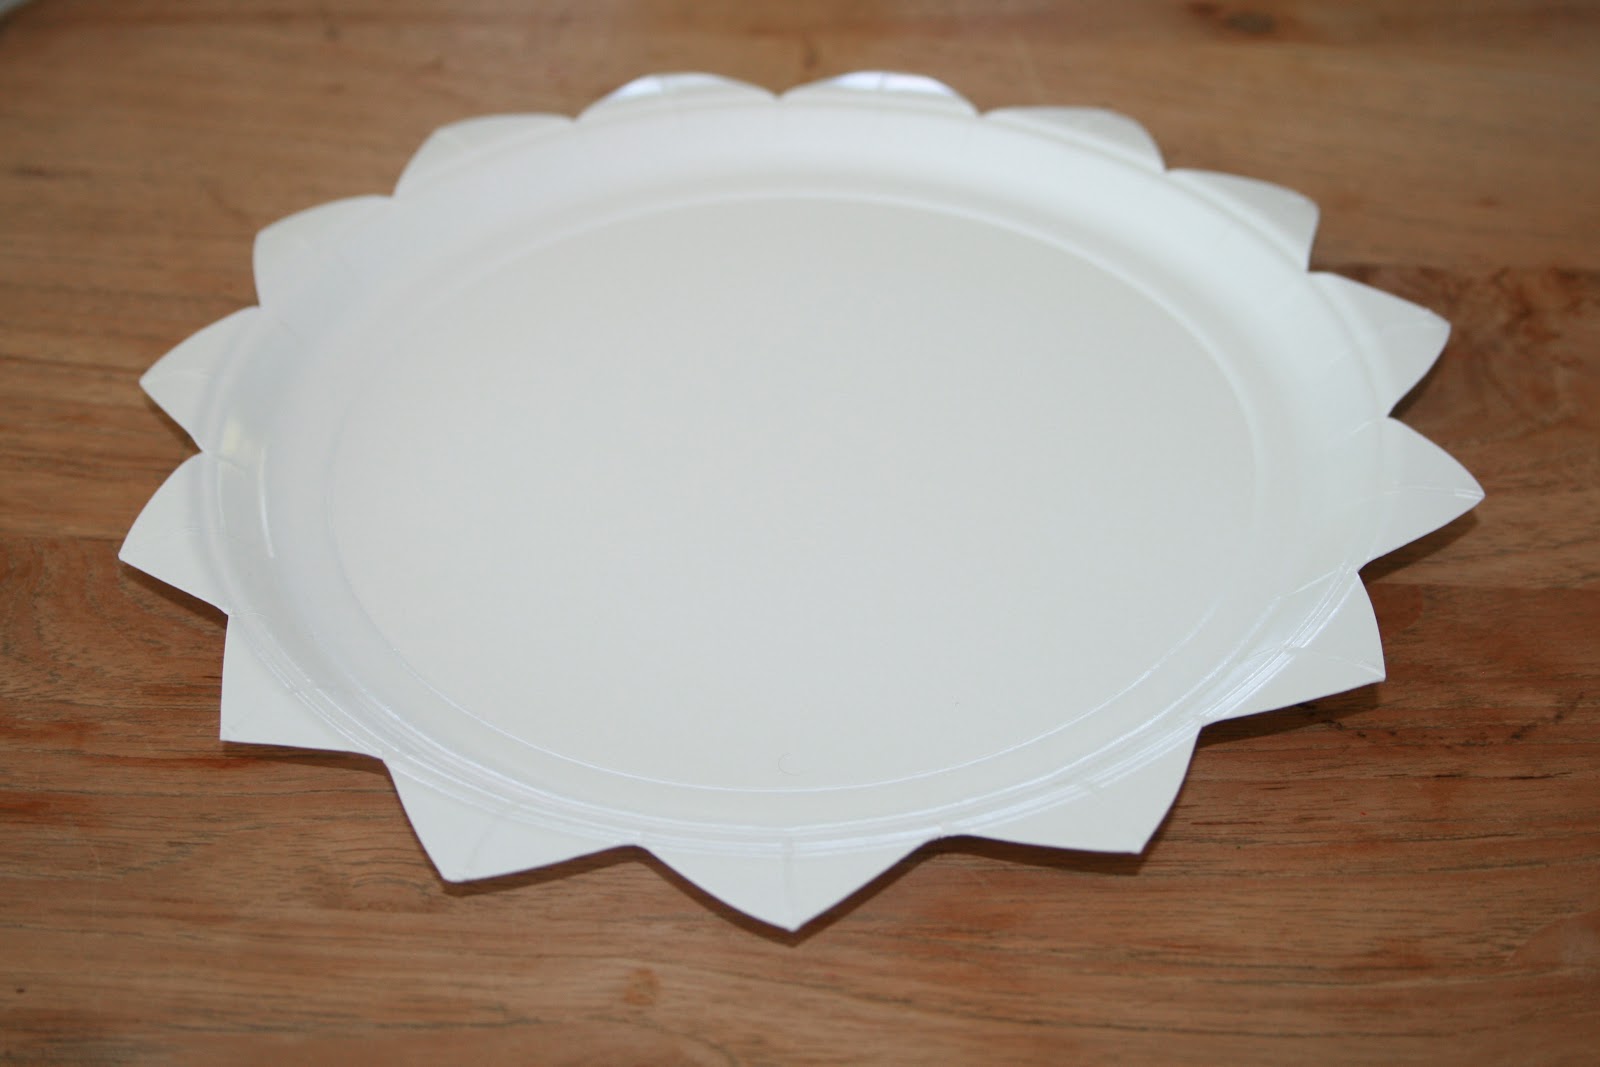
First, I took a small paper plate and cut the edge like this...

Then I took a bigger one and cut the edge as well like that...


I took a cup that I glued upside down in the middle of the big plate (with white glue),
And the small plate on top, like this...

To make it a little bit more fancy i added a cup on top, that I cut in half first, and finished off with the same pattern of the plate... Then glued little half plastic marbles to my stand a little shiny... There you have it, a beautiful fairy cupcake stand...

Ok, now the tea cups, we will need paper cups and the dessert size paper plates.

Cut the paper cup as shown above...
You will end up with this.

Then secure the long bit under the cup, it should hold by itself but if you are not too sure you can glue it with white glue.

And I finished the tea cup by glueing a little plastic marble at the top of the handle.

For the saucer, a paper dessert plate that I cut all around the borders like flower petals.
Here is the result... Beautiful fairy tea cups and saucers..


For the food, I made some fairy wand biscuits for each of the guest.
 Recipe of the biscuit:
50g soft butter
75g sugar
1 egg yolk
1teaspoon clear honey
1 teaspoon vanilla essence
2 teaspoon milk
125g flour
Baking tray
Baking paper
Star cutter
Skewers
Fondant, different colors
Icing pens
Preheat your oven at 180°C
1- Beat the butter and the sugar until white and fluffy, then mix in the egg yolk.
2- Stir in the honey, vanilla essence and milk. Add the flour into the bowl, then mix with a spoon.
3- Use your hands to squeeze the mixture until you make a ball of dough, if too dry add a drop of milk, if too sticky add a spoon of flour.
4- Sprinkle a work surface with flour, then roll out the dought until it is about 5 mm thick. Use the cutter to cut out the stars.
5- Cover the baking tray with the baking paper, then put the stars onto it, and finish by inserting a skewer in each of them. Squeeze the scraps into a ball, roll them out again and cut out more shapes.
6- Bake them for 6 to 8 minutes, then carefully take them out of the oven. Leave them to cool on the baking tray.
7- Sprinkle a work surface with icing sugar, then roll out the fondant until is about 2-3 mm thick. Use the same cutter to cut out the stars.
8- Wet with a little water a star biscuit, then top it up with a star fondant, press lightly over to stick them together. Write the name of the guest with the icing pen.
I obviously made some cupcakes...
You will find
the recipe in a previous post dated of April 23th, 2012.
I just found those Lavender Petal Baking cups, they are from the brand
Wilton ( check out their website, they have amazing stuff! ) I thought there were beautiful and perfect for my fairy theme, but seeing the result!!... I was blown away!! They are just exquisite!...

As it was not for a party, I didn't make too much food, I served
my homemade lemonade and I bought some sweets.
Now, everything is in the set up of the table, I picked all the little fairy toys that Matilda had, I spread a white table clothe, arrange the tea cups and saucers, the cupcake stand, found a Playmobil plant stand that I used to showcase my magic wand biscuits, place every toys carefully on the table, then the food. Matilda came back from the garden with beautiful flowers she picked from the garden, so of course we placed them on the table, here are some pics...
Now the activity,
We made some fairy wings,
What we need...
Wire,
Strong tape,
Different pieces of fabric,
String
Beads
Fake flowers, leaves,
Some elastic.
1- With the wire make a 8 shape, see below in red.
2- Secure it with the tape, see below in green.
3- Pull up each wing like the purple arrow shows you below.
Now, you have the structure of your wings.
4- Cut long pieces of fabric, then use them to hide the wire going around it many times...
5- When you done, the fun part starts, use the fabric, the flowers, the leaves to decorate the wings as you like, secure them with the tape, or use the metal stalk which comes usually with those fake flowers.
6- Make the kids bead the strings when they need your help so if you are already with someone else they don't get bored!
7- Then use the beaded string to finish the look of your wings!

8- Finish by putting the elastic for your fairy to wear her wings.
Take a 70 cm long elastic which it is represented in orange, see below. Attached it at its middle on the top of the wings, see orange dot. Then take first extremity, make a knot where the green dot is, and the second one where the red dot is.

Here is a few versions you can end up with... and of course you can make crowns and wands the same way! Have fun!...


Matilda and her friends had a wonderful time!
Artistically yours,
Miss Drey.
Hi lil'guys!
Matilda has been asking me for a tea party for a few weeks now, just with her closest friends... And because it was just for a play date, I decided to go for the lowest budget that I could go for, so here it is what I came up with...
Any party, small or big needs a pretty invitation,
Matilda drew sweet fairy version of her guest friends and herself, I wrote their name on top of each silhouette, then I photocopied them 6 times (5 guests + 1 for Matilda for keepsake), cut each little fairies in a petal shape; I had some pretty paper in my "art" cupboard, I glued my 6 petals into a flower on it, then cut the edges following the petals, I finished by cutting two circles and glued them in the center as heart of the flower...
Of course at the back, I wrote the the details of the party, the date and the time, the address and a little map if necessary, a phone number/email address with a date to RSVP. I do write usually the programme of the party but it is not a must. Here are them!!!....They are so cute!!!...
For the Fairy Tea Party table,
We will need obviously tea cups and saucers, pretty plates for the "finger food" and a cupcake stand (they are so elegant on a party table...) So i got some paper cups, dessert plates and normal paper plates, all in white...
First, I took a small paper plate and cut the edge like this...
Then I took a bigger one and cut the edge as well like that...
I took a cup that I glued upside down in the middle of the big plate (with white glue),
And the small plate on top, like this...
To make it a little bit more fancy i added a cup on top, that I cut in half first, and finished off with the same pattern of the plate... Then glued little half plastic marbles to my stand a little shiny... There you have it, a beautiful fairy cupcake stand...
Ok, now the tea cups, we will need paper cups and the dessert size paper plates.
Cut the paper cup as shown above...
You will end up with this.
Then secure the long bit under the cup, it should hold by itself but if you are not too sure you can glue it with white glue.
And I finished the tea cup by glueing a little plastic marble at the top of the handle.
For the saucer, a paper dessert plate that I cut all around the borders like flower petals.
Here is the result... Beautiful fairy tea cups and saucers..
For the food, I made some fairy wand biscuits for each of the guest.
Recipe of the biscuit:
50g soft butter
75g sugar
1 egg yolk
1teaspoon clear honey
1 teaspoon vanilla essence
2 teaspoon milk
125g flour
Baking tray
Baking paper
Star cutter
Skewers
Fondant, different colors
Icing pens
Preheat your oven at 180°C
1- Beat the butter and the sugar until white and fluffy, then mix in the egg yolk.
2- Stir in the honey, vanilla essence and milk. Add the flour into the bowl, then mix with a spoon.
3- Use your hands to squeeze the mixture until you make a ball of dough, if too dry add a drop of milk, if too sticky add a spoon of flour.
4- Sprinkle a work surface with flour, then roll out the dought until it is about 5 mm thick. Use the cutter to cut out the stars.
5- Cover the baking tray with the baking paper, then put the stars onto it, and finish by inserting a skewer in each of them. Squeeze the scraps into a ball, roll them out again and cut out more shapes.
6- Bake them for 6 to 8 minutes, then carefully take them out of the oven. Leave them to cool on the baking tray.
7- Sprinkle a work surface with icing sugar, then roll out the fondant until is about 2-3 mm thick. Use the same cutter to cut out the stars.
8- Wet with a little water a star biscuit, then top it up with a star fondant, press lightly over to stick them together. Write the name of the guest with the icing pen.
I obviously made some cupcakes...
You will find
the recipe in a previous post dated of April 23th, 2012.
I just found those Lavender Petal Baking cups, they are from the brand
Wilton ( check out their website, they have amazing stuff! ) I thought there were beautiful and perfect for my fairy theme, but seeing the result!!... I was blown away!! They are just exquisite!...
As it was not for a party, I didn't make too much food, I served
my homemade lemonade and I bought some sweets.
Now, everything is in the set up of the table, I picked all the little fairy toys that Matilda had, I spread a white table clothe, arrange the tea cups and saucers, the cupcake stand, found a Playmobil plant stand that I used to showcase my magic wand biscuits, place every toys carefully on the table, then the food. Matilda came back from the garden with beautiful flowers she picked from the garden, so of course we placed them on the table, here are some pics...
Now the activity,
We made some fairy wings,
What we need...
Wire,
Strong tape,
Different pieces of fabric,
String
Beads
Fake flowers, leaves,
Some elastic.
1- With the wire make a 8 shape, see below in red.
2- Secure it with the tape, see below in green.
3- Pull up each wing like the purple arrow shows you below.
Now, you have the structure of your wings.
4- Cut long pieces of fabric, then use them to hide the wire going around it many times...
5- When you done, the fun part starts, use the fabric, the flowers, the leaves to decorate the wings as you like, secure them with the tape, or use the metal stalk which comes usually with those fake flowers.
6- Make the kids bead the strings when they need your help so if you are already with someone else they don't get bored!
7- Then use the beaded string to finish the look of your wings!
8- Finish by putting the elastic for your fairy to wear her wings.
Take a 70 cm long elastic which it is represented in orange, see below. Attached it at its middle on the top of the wings, see orange dot. Then take first extremity, make a knot where the green dot is, and the second one where the red dot is.
Here is a few versions you can end up with... and of course you can make crowns and wands the same way! Have fun!...
Matilda and her friends had a wonderful time!
Artistically yours,
Miss Drey.